Tuesday, August 30, 2011

Insulated Flat Iron Case


I saw one of these for sale for $20 and thought I could attempt one for cheaper.
I found the pattern on this site. See the site for details.
Print the pattern. I had to add some length in since it wasn't quite to the measurement.
I love the fabrics!
All the pieces cut from main fabric, thicker twill, thermal batting, and fusible lining.
Cut and layer pieces as shown.
I had to make a plug for my newest discovery, the walking foot on my machine! With the normal foot, my top cotton fabric was puling and stretching as seen below. The walking foot keeps all the layers together!! So glad I did a bit of research and pulled it out.
Walking foot!
The fusible webbing.
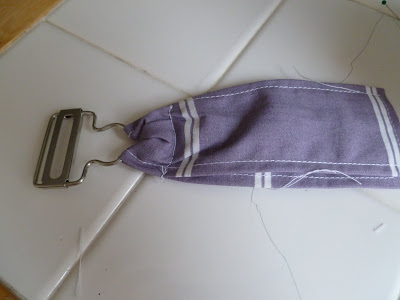
Coming together...
Hardest part... the bias tape.
Done!!

Iron pocket, nice to throw hot iron in when on the run. Plus it's padded so it protects it while traveling.
Cord pocket on back so cord doesn't melt if iron is hot.


Sunday, August 28, 2011

Dress!


I used the pattern to the right along with this dress as the inspiration for a few modifications that I wanted added.

"getting the vision"
One of the hardest parts... planning it all out before cutting,
Measure 10 times, cut once :)
More "envisioning" the end product
Top of dress
Sleeve

Top complete!
Even fancy enough to have a lining!
The edges of the sleeves and gathered sleeves instead of elastic were diversions from the pattern that I added from the inspiration blog.
Coming together, deciding how much extra length to add to the skirt, my daughter is very tall.
Of course I had to whip out an extra bow. See how to make these here.
Back (complete!)
Sleeves up close (one of my favorite parts)
Front (Complete!)
Lining...
This was a really fun project. It went quite smoothly until the zipper in the back. Those things are quite the headache but by attempt #3 it was in and usable. I learned some good things along the way that will hopefully make next time easier.

Thanks for reading!

Monday, August 22, 2011

Starlight Nightlight


I saw this and a lightbulb went off! I've had a few canvasses sitting around, this would be a great nighlight for baby. It's interesting to look at and will hopefully distract little one as she drifts off to sleep.
Begin with a plain canvas

Mark your design on the back with pencil
Poke small holes to push the lights through. I was able to just use the metal tip of my mechanical pencil to poke a pin hole and then pushed the glass bulbs through so they're snug.
Continue weaving your design, editing as needed by looking at the front. Note: It's a good idea to count the lights on the strand you have and make sure you have enough for your design ahead of time. I also poked one hole at a time to make sure I'd have enough lights to complete my design.

Finish up, plug it in and wa la!

A nice little night light!

Sunday, August 21, 2011

Green Smoothies


The name smoothies makes me think of Jamba... it's not quite Jamba. I enjoy vegetables on their own but I am not a big fan of salads so I decided to give the green smoothies a try. It's a quick way to get some water, spinach, veggies and fruits in my body. Throw in whatever you've got and drink up!

A few "ahas" I've discovered:
+Smoothie is better when chilled in refrigerator
+Smoothie is better when it's had multiple hours to sit
+Leave out the celery and eat it separate later, it's too overpowering of a taste
+No one is aloud to say it's gross, especially me!
+Drink with a straw and you can bypass the teeth and indeed many taste buds if you desire :)

Bottoms up to some more fresh produce in my diet

~Why not try it with me?~

Friday, August 19, 2011

Thursday, August 11, 2011

Nursing Cover


For the past 8 months I've been using this pink and brown nursing cover. That was fine for a small baby but H. is getting big and any sudden movement and those around me may have been getting a sneak peek. Time to take a twin sheet I already had in my sewing stuff and turn it into an oversize nursing cover. I used the boning and clip from my past nursing cover.


I didn't have D rings so I just turned the overalls clip I had upside-down and made that what I lace the other side through to hold the neck.


Click HERE for my inspiration (I used my own dimensions)