Wednesday, February 29, 2012

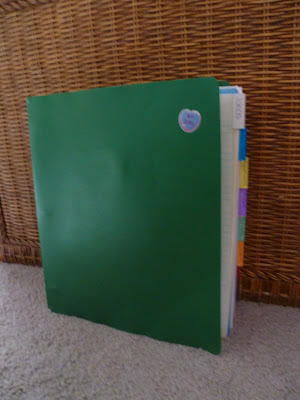
Recipe Binder

I had an old binder from school with dividers.

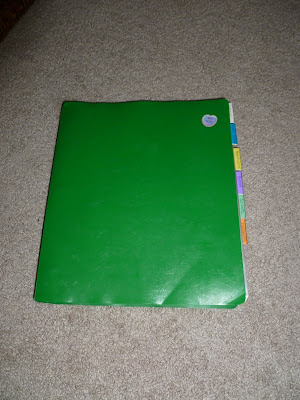
Here are the categories I picked

I put all photocopied recipes in page protectors

For recipe cards I used these photo pages where you stick the pictures (Cards) in and stick the cover back over.

There are also pocket dividers in each section for loose cards.


Posted by Picasa

Thursday, February 23, 2012

Toy Box

I purchased cheap wrapping paper after Christmas and covered a box we had from water jugs for baby's humidifier. Cheap toy box with colors that match decor!

Monday, February 13, 2012

Turkey Shirt

This was a project from November but I decided to post it in February in case anyone want's to get a jump-start on next Thanksgiving :)

Find a brown shirt and fun ribbon. You can use a rainbow of colors or just a few colors.
My "snowman" turkey. 
I cut the shape out free hand

Start to make loops with your ribbon. I did one of each on each side to make it look symmetrical
Keep adding. I cut the pieces of ribbon and used a dot of hot glue to keep it together as a loop and then moved the loops around behind the turkey.
Cut out a second turkey shape in iron-on backing.
Oh and I sewed a funny little beak on the turkey's face. 
Something I would have done different would be to sew the eyes here now.


I was debating over the loops facing in or out... I decided to have them facing like this.

To finish up, I decided I wanted to keep this brown shirt just a plain brown shirt after thanksgiving so I didn't iron on or glue anything to the shirt. I just glued the ribbons with hot glue to the back of the turkey. I then sewed around the turkey's body with a stitch that could be easily cut out after Thanksgiving!

Sorry, no picture of the eyes. To make them I just marked where I wanted them with a pen, and set my sewing machine (with black thread) to the shortest stitch length and went back and forth until I had a "dot" for the eye. 

Wa La! A Turkey-Day shirt.
Sunday, February 12, 2012

Personal Progress Projects

I have been working on completing our Church's Personal Progress Program again!
This is a program that is somewhat like scouting for the girls (12-18) in our church. There are value areas (Faith, Divine Nature, Individual Worth, Knowledge, Choice and Accountability, Good Works, Integrity and Virtue) and in each area there are listed activities/projects such as "read these specific scriptures, talk with a leader or parent about what you've learned, apply one of the new things you've learned in your life for two weeks and record your experience in your journal." It's been a great tool for me to have more meaningful scripture study and a great way to improve myself.
For each area there is a list of different 10 hour projects. You can pick on of those or create a similar one that highlights that area's theme and work on it.
As I leader I need to do at least three of these (one being reading the whole Book of Mormon!)
It's been so fun!

As I posted a few days ago, I started learning to decorate fancy cakes. Below are some of my first 1/2 roses. They're quite rough but it's been fun to practice!

I know the stem isn't exactly the natural color but it's what I had on hand and why waste frosting that's there for some practicing?

Another Personal Progress Project is planing an herb garden. Here are my seedlings!
So far mustard, thyme, marjoram, savory and basil have sprouted. I was most excited for chives but they have yet to appear. I have FAITH they will (well maybe not, the seeds are quite old :)


My newest project (this picture shows the craziness of getting this all put together) is our 72 hour kits! Emergency preparedness has been my plan for February 2012 for a few months and I have been really excited (kind of scared) but mostly excited to begin this project. It's fun to have little baggies for each person with food, safety, sanitation and fun supplies. Once these are all done, I'll blog about what I used and my spreadsheet that I am using to keep it all organized.
Posted by Picasa

Sunday, February 5, 2012

Photo Holder

Here is a Christmas gift I made for Marmee and Papa. I decided to try the new technique I saw on Pinterest. Print out your words and outline on top of the paper with a ball point pen. Pushing on the wood creates an indentation in the wood underneath for you to paint within.


Inspiration Site!


I painted the whole thing white and then blue and then painted the lettering white.

Great technique. 
I then sanded the edges a bit to let some white show through.

I got adventurous and disassembled the clothes pins. I then painted all the wood pieces white, waited for them to dry, and attached the metal spring to one half.
I then measured and nailed the 1/2 pins along the board bottom.


I then used a paintbrush to open the spring up (which took some practice, it's like working with mousetraps, yikes!) and slid the other half in.


Make sure to add one of these to the back :)
Proud grandparents can then clip pictures of their grandkids to the board and have them out for all to see :)

Thursday, February 2, 2012

Cake Decorating Take One


Thanks to an awesome birthday present (thanks Mom and Dad) I can now learn to make those AWESOME cakes I've seen around. Let's start with the basics -- this is new to me.

First off, start with a no-lose cake recipe (I chose the cake on the Hershey website)


Make sure you have some moral support close by. Here's my helper.


This vanilla is clear so it doesn't tint your frosting... smart.


Look at my cool cake slicer! I had to make a four layer cake so I could use the slicer.


See if you can enlist someone's help. My husband decided to lend his culinary brilliance to the filling (strawberries, cream cheese, chocolate chunks and chocolate sauce, AMAZING!)


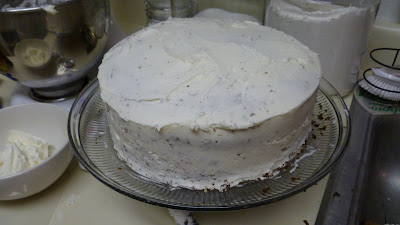
Frost (remember for next time: dark cake and white frosting are hard to keep clean)


Tint!


The right frosting and cool tips make this pretty easy (at least these very basic techniques)


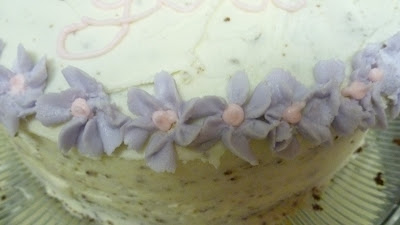
Purple... this frosting was too tough and my flowers kept crumbling and not sticking to the cake
So I added about 1 1/2 tsp. corn syrup like the book said. It made a WORLD of difference.


Purple Flowers!

I had to try the rainbow frosting. Paint the inside of the bag with the colors and fill with white icing.


Look how cool it looks?


There it is. I don't love the taste of butter cream but a bit between the layers is pretty good :)
Can't wait to try some more fun techniques like making roses!